
A newer Berczy Village home with a stucco entry
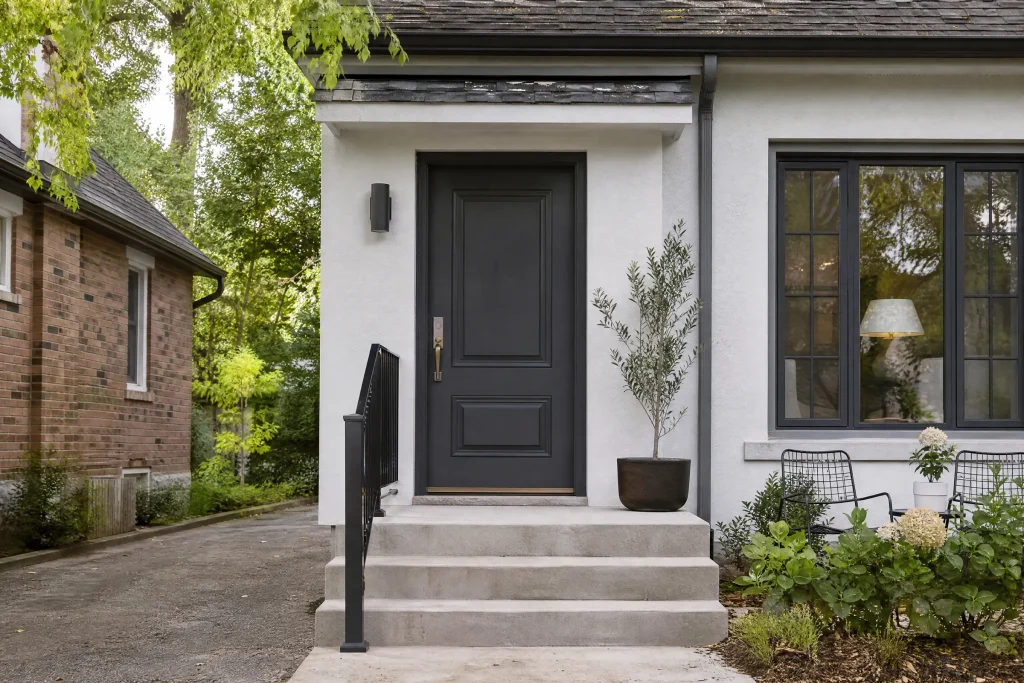
Berczy Village is one of the newer parts of Markham, filled with detached homes and townhomes built far more recently than the heritage houses of Unionville and Markham Village. This house is a detached two-storey with a modern entry: a fibreglass front door with a tall glass sidelight, set into a recessed wall of light grey stucco beside a band of dark grey brick, with clumps of ornamental grasses planted on either side of the step.
The door had been a builder tan when the house was new. A previous owner had brushed a grey-green coat over it, and that coat was where the trouble started. The current owners wanted a darker, more modern colour, but first they wanted a door that opened without tearing.
A coat of paint that never hardened
Opening the door made a sticky peeling sound. The paint on the edges and along the latch side had bonded to the rubber weatherstripping, and each time the door opened, a little more of it tore away, leaving tan patches and grey-green strings of paint stuck to the seals. Pressing a fingernail into the face of the door left a mark that stayed. The coat was rubbery rather than hard.
A soft coat like this usually comes from one of a few things: a paint not made for exterior doors, a coat applied too thickly, or paint put on in cold or damp weather so it never cured properly. We could not know which it had been, and it did not change the answer. Paint cannot be applied over a soft layer, because the new coat would only be as sound as what is under it. The soft coat had to come off.
The other problems at the entry
- The wood brickmould on the hinge side had gone soft at its bottom corner, where water collects on the step.
- The clear sealant around the sidelight glass had cracked and pulled away along the bottom edge.
- The stucco around the door is rough, so masking tape will not seal against it, and any slip with the brush would show on the light grey.
Prep, from the plants inward
- Plants and step. The ornamental grasses were gathered with soft garden twine and wrapped loosely in burlap so they would not brush against wet paint. The step and walkway were covered with drop sheets.
- Hardware. The handleset, the deadbolt and the door viewer were removed and bagged, and the holes were covered with tape from the inside.
- Removing the soft coat. Most of it lifted with plastic scrapers, which will not gouge a fibreglass skin. Where it held on, we used a stripper made for fibreglass doors, testing it first on the hinge edge to make sure it did not soften the factory surface. The residue was scrubbed out of the woodgrain texture with maroon abrasive pads and rinsed clean.
- No sandpaper on the texture. A fibreglass door with a moulded woodgrain can be sanded through in seconds, leaving a flat, shiny patch that shows through paint. The abrasive pads dull the surface enough for primer to grip without flattening the grain pattern.
- The brickmould repair. The soft wood at the bottom corner was dug out to firm fibres, soaked with an epoxy consolidant to harden the edges of the cavity, then filled with a two-part epoxy wood filler and shaped to match the profile once cured.
- Sidelight glazing. The cracked sealant around the glass was cut out, the channel cleaned, and a bead of clear paintable glazing sealant run along each edge.
- Weatherstripping. The old paint strings were picked off the rubber seals and the seals were wiped down so nothing would transfer to the new finish.
Primer
Fibreglass is smooth and non-porous, and so is the factory coating on a sidelight frame. We used a waterborne bonding primer made for exactly that kind of surface, brushed and rolled onto the slab, the sidelight frame and the brickmould. The epoxy repair took the same primer, so the whole entry had one even base before any colour.
Painting the door in place
This door stayed on its hinges. Unlike a flat steel slab, a textured fibreglass door hides minor marks well, and a technique called rolling and tipping gives a smooth result with the door hung. A small dense foam roller laid the paint on each section, and a brush followed straight away in long, light strokes along the direction of the moulded grain, which removes the roller texture and leaves the brush marks lying where real wood grain would.
The finish is an exterior acrylic door and trim enamel in satin, chosen partly for its block resistance, meaning it is formulated not to stick to itself or to weatherstripping once dry. Given what had happened before, that mattered. Each coat was applied thin and only on warm, dry days. Any moulded detail was painted first, then the broad faces, then the edges. Two full coats went on, with the second applied after the recoat time on the label had passed and the first had been checked for runs.
The door stood propped open on wedges until each coat was dry to the touch, then was closed for the night. We waited until the finish was firm before refitting the hardware, so the screws would not bite into soft paint.
Against the stucco
Because tape will not seal on rough stucco, the line where the brickmould meets the wall was cut in freehand with an angled sash brush, holding the bristles just off the stucco. It is slower than taping, but it gives a crisp edge instead of paint bleeding into the texture underneath the tape.
Glass edges
On the sidelight, the paint was taken just onto the glass along the frame, about the thickness of a coin, so the joint between frame and glass is sealed. After drying, the excess was trimmed with a razor scraper for a clean, straight edge.
Why charcoal, and why satin
The owners had narrowed the choice to charcoal, deep navy or a dark green before we started. As part of our free colour consultation, we painted each on a primed sample board and the owners held them against the stucco next to the sidelight, first under the bright morning light that falls into the recess, then again in the evening.
The navy looked almost purple against the cool grey stucco in evening light. The green was handsome but fought with the colour of the grasses. The charcoal sat naturally with the stucco, darker but in the same family, and it made the sidelight glass read as part of the door. Satin gives a soft sheen that suits a modern entry and cleans easily, without the mirror shine that would show the texture of the fibreglass. Zero‑VOC and low-odour options were offered, since the front hall would be open to the porch while the coats dried.
Leaving the entry clean
At the end of each day the step and walkway were swept, the drop sheets lifted and folded, scraped paint and stripper residue bagged and taken away, and the grasses unwrapped so they could get air and light. The final visit included removing every scrap of tape from the inside face, cleaning the sidelight glass inside and out, and untying the grasses.
The result and the care it needs
The entry is now a single charcoal unit: door, sidelight frame and brickmould in the same satin finish, framed by clean light grey stucco. The door swings shut without sticking, and the woodgrain texture still shows through the paint.
- Avoid taping notices or decorations directly to the door for the first few weeks while the finish fully cures.
- Clean with water and a little mild soap. Keep solvent cleaners off the sidelight glazing sealant.
- If the weatherstrip ever leaves a mark, wipe both the seal and the edge of the door; do not scrape.
- Look at the epoxy repair at the bottom of the brickmould each spring and keep the sealant there intact.
- A labelled can of the charcoal and the primer stayed with the owners for small chips.
Fitting the work to Markham’s newer homes
Homes in Cornell and Berczy Village are newer than the porches and wood trim of Unionville, and their doors tend to be fibreglass or steel rather than solid wood. That changes the prep: no heavy sanding, primers made for smooth surfaces, and care around modern finishes such as stucco and large glass sidelights. Our front door refinishing service covers those materials as well as older wood doors, and the Markham page describes the housing mix across the city. We also work across York Region, from heritage main streets to new subdivisions. If your door sticks or peels, reach out with a few photos and we will set out the removal, repairs and finish coats on an itemized written quote.