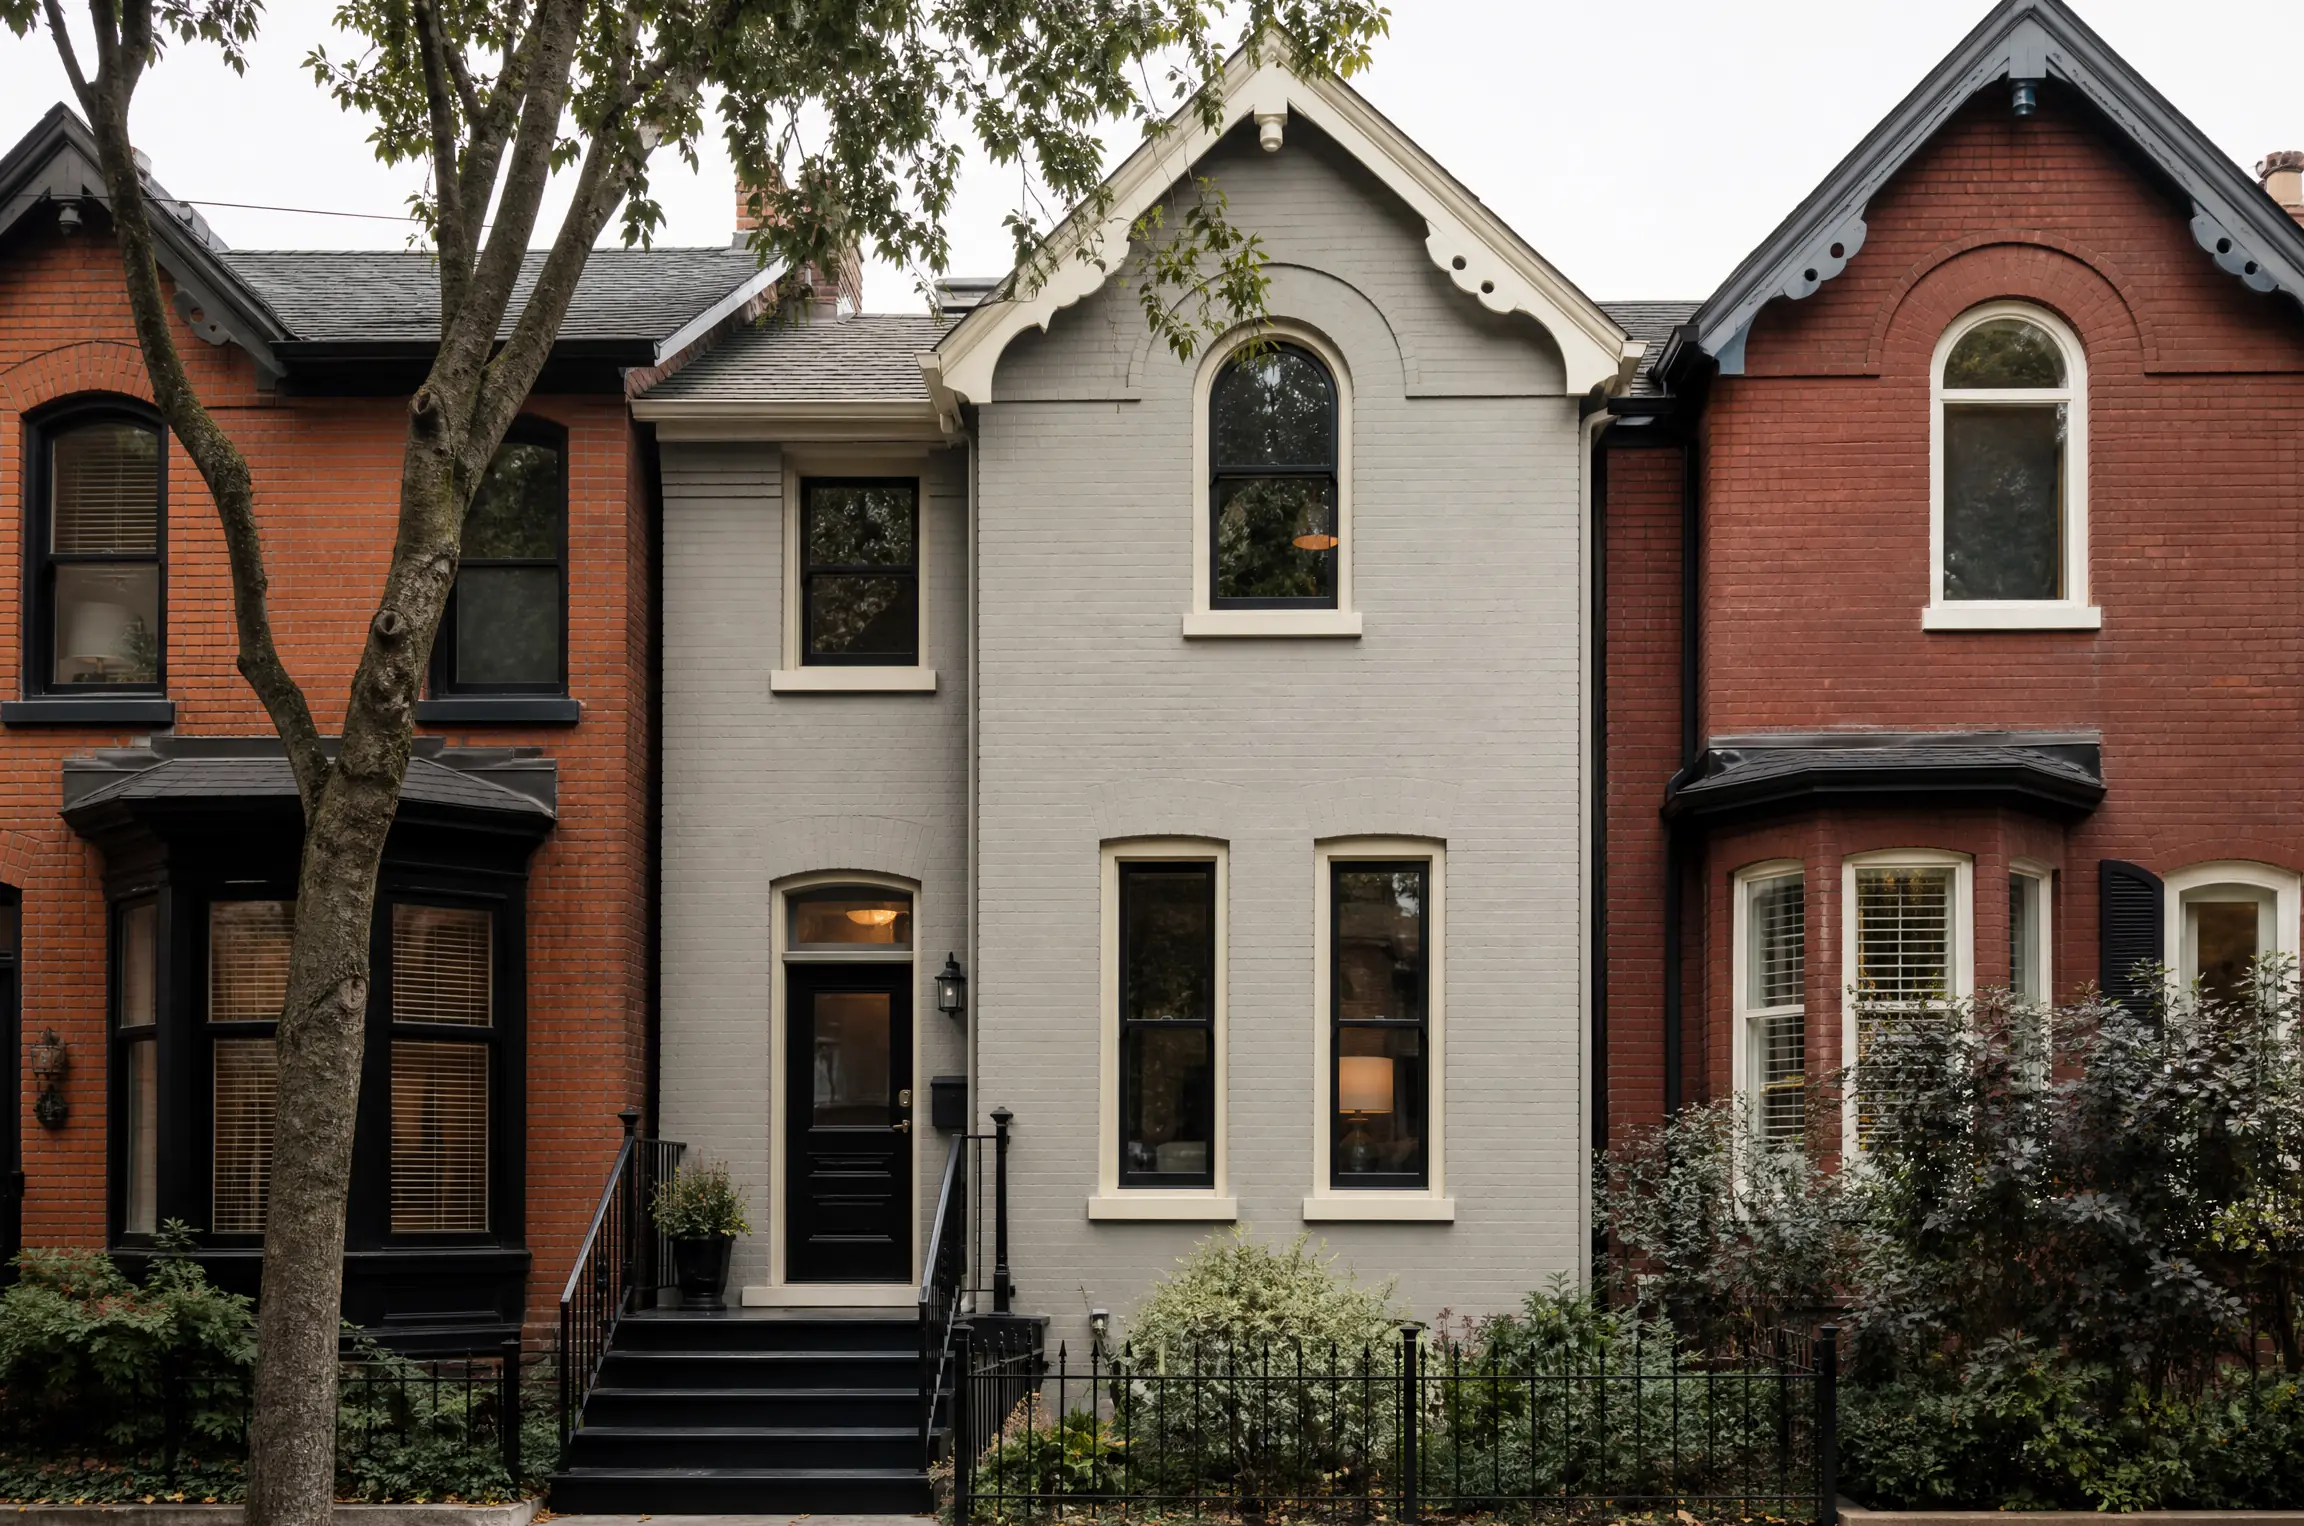

A Victorian row house close to the sidewalk
Cabbagetown’s side streets are lined with Victorian and Edwardian row houses and semis, many more than a century old, set only a few steps back from the sidewalk. This house sits in the middle of a row, attached on both sides, with a tall brick front of two storeys under a steep attic gable trimmed in cream bargeboard, arched windows with cream-painted frames, a recessed front door and a tiny front yard. Its brick was painted long before the current owners bought it, and at some point it had been repainted over that, more than once.
The owners had looked into stripping the paint off completely and going back to bare brick. Stripping old paint from soft Victorian brick, though, risks damaging the faces, and much of the old paint was still firmly bonded. They decided instead to repaint, properly this time, in a colour that would let the house read as brick again.
Paint that had trapped water
The front was in poor shape. Large blisters had formed across the lower storey and under the window sills, and many had burst, leaving the paint hanging in curled sheets. Underneath, the original brown brick showed through in patches, light mortar in the joints between. Higher up, the paint was chalky but mostly sound.
The pattern pointed to trapped moisture. Victorian brick and its lime mortar are soft and porous and need to dry outward. Somewhere in the house’s history, a coating that let very little moisture through had been applied over the whole front. Water from rain, from the ground and from inside the house had collected behind it, and every winter the freeze-thaw cycle pushed the paint further off. In a few places, the outer faces of individual bricks had come away with the paint.
What else made it harder
- Dry scraping or sanding old paint this close to the sidewalk would have spread dust onto people walking by and into the neighbours’ open windows.
- Mortar joints had worn back along the bottom courses and under the sills, and each needed checking before primer.
- The house shares its brick with the neighbours on both sides, so every edge had to stop cleanly at the party walls.
- Street parking is tight on these blocks, and the sidewalk had to stay open to people walking past.
Scraping without spreading dust
- Reading the wall. Before any scraping, we went along the front with a stiff putty knife, testing the edges of the old paint, and marked out which areas were loose and which were still holding hard.
- Containment. Plastic sheeting was laid over the front yard and steps and taped up the base of the wall, with drop sheets over the plastic for footing. The sheeting stopped at the property line, and the sidewalk stayed clear.
- Wet scraping. Loose and blistered paint was misted with water from a pump sprayer and scraped off by hand. Wetting keeps dust down. No power sanders or heat guns were used, since both throw old paint dust and fumes into the air on a street this tight.
- Collection. Chips were gathered as we went, the sheeting misted and wiped, and the work area finished each day with a HEPA vacuum. Waste went into heavy bags, sealed and taken away.
- What stayed. Paint that was firmly bonded was left in place after a knife test along its edges. Taking off sound paint on soft brick can pull the face off with it.
Checking the joints and brick faces
With the loose paint off, we ran a pointed tool along the mortar joints. The worn ones had receded from the brick face, but the lime mortar behind them was firm, so they were brushed out to clear loose sand and grit rather than dug out. Soft old brick and lime mortar are meant to work as a pair, with the mortar as the weaker partner that gives way first. That is why any future repointing on a front like this belongs in a lime mix, never a hard cement mortar that would outlast the brick and make it crack and spall. Bricks that had lost their faces were brushed clean so the primer could bind their softer exposed cores.
Masking and protection
The cream window frames, the recessed door surround and the house numbers were masked with film and tape. Plastic was taped over the neighbours’ brick for a short way beyond each party wall line, since their windows sit right beside ours.
A breathable system from primer to topcoat
The whole point of the repaint was to stop trapping water, so the products were chosen as a system. We used a mineral-based masonry primer and matching paint, designed for older soft brick and able to go over sound existing coatings while letting water vapour through. The primer went onto every bare area, so the brushed-out joints, the bricks that had lost their faces and the exposed brown brick would all take the finish evenly.
The finish coats were applied with masonry brushes and thick-nap rollers. On a row house close to the sidewalk, spraying would have sent mist onto passers-by and parked cars, so we did not use a sprayer. The brushes worked the paint into the joints and the worn brick faces; the rollers carried it across the flat areas. Two full coats went on, each in dry, mild weather, with the label’s recoat time followed between them. The flat sheen keeps the wall looking like masonry.
At each party wall, the line followed the vertical mortar joint where the neighbours’ front begins. Both sets of neighbours had been told when the work would happen and had seen the colour in advance.
A deep brick red
The previous paint had been a pale beige. The owners wanted the house to look more like the unpainted brick fronts further along the street. For the free colour consultation, reds and browns from sample pots went onto the primed brick beside the door: a terracotta, a deep brick red and a dark chocolate brown. The owners compared them early in the day, with the street in shade, and again late in the day, when sun comes down the street and lights the front.
The terracotta looked orange in sun. The chocolate brown looked almost black in shade. The deep brick red sat closest to the original brown-red brick still showing in the scraped patches, and against the cream window frames it gives the front a traditional Victorian look.
Working on a busy block
We loaded tools in from a short stop at the curb and moved the vehicle right after, since parking near the house was rarely free. Ladders went up only inside the front yard, footed on boards over the plastic, and the sidewalk was never blocked. Before leaving each evening we vacuumed up chips, misted and wiped the sheeting, sealed the bags, took down and locked the ladders and cleared the steps so the owners could get in and out.
The front today, and keeping it sound
The house now has an even, deep brick red front with a soft, flat finish, the mortar lines still visible, framed by crisp cream window surrounds. From across the street it reads as an old brick house rather than a painted box.
- Watch the lower courses and the areas under the sills. A small blister there is an early sign of water getting in, and it is far easier to deal with when small.
- Keep the sills and the joint at the top of the steps caulked or pointed, since water collects at both.
- Do not seal the front with a clear water repellent; it would work against the breathable paint.
- Labelled primer and paint stayed with the owners. Breathable mineral paint takes small touch-ups well.
Why this suits downtown row houses
Many Victorian and Edwardian houses in Cabbagetown, Corktown and Kensington Market have brick fronts that were painted decades ago, often with coatings that do not suit soft brick and lime mortar. Treating those fronts as a breathable system, with careful hand prep and the right mortar underneath, is what lets the paint stay on. That is how we approach painted brick on older houses, and our Toronto page covers the wider mix of row houses, lofts and condos we work in. We are painters across Toronto and the GTA, and have been since 2010. For a painted brick front that is blistering or peeling, contact us about a visit; prep, repairs and coats will each be set out in a written, itemized quote.