
An open stair in a Jefferson two-storey
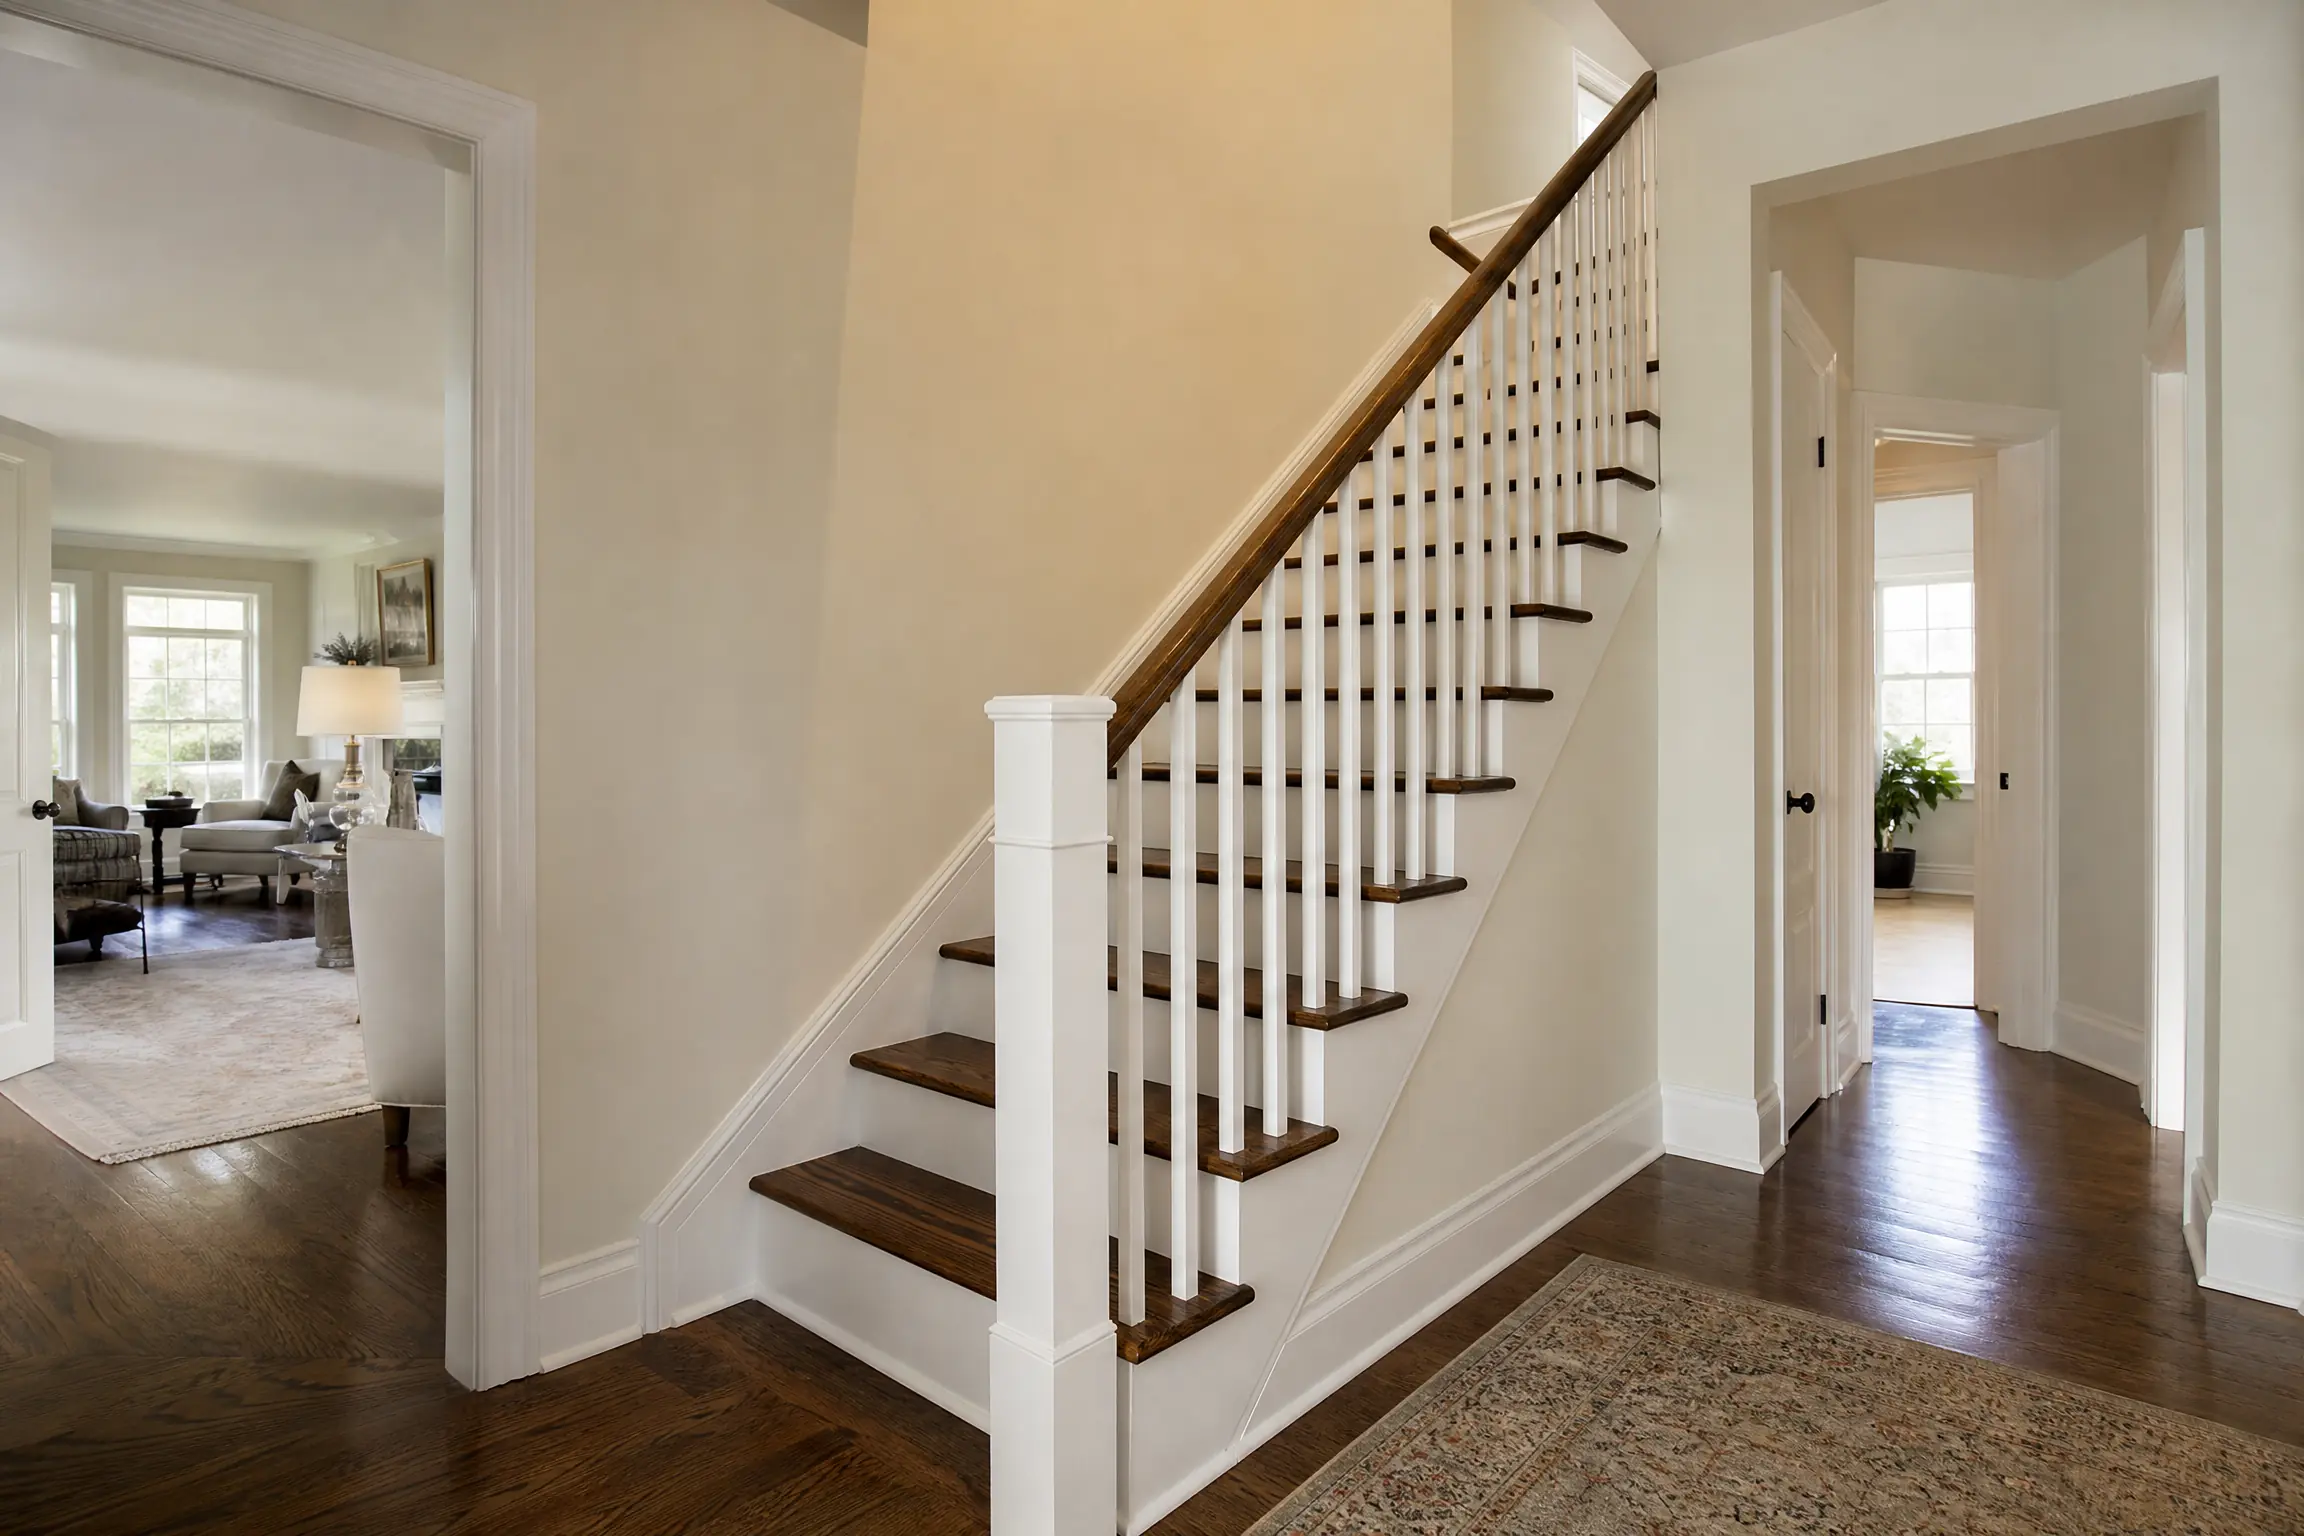
This house sits in Jefferson, on the west side of Yonge Street, where many detached homes have double-height entries and an open staircase as the first thing you see from the front door. Here, a tall window above the door throws daylight straight across the stair. The staircase itself was built in red oak: oak treads with white painted risers, an oak handrail with a curled volute at the bottom, a gooseneck where the rail rises at the landing, oak newel posts, and turned balusters painted white.
The owners meant to keep the layout and the treads, which only needed a refresh. What bothered them was the rail and the balusters. The handrail looked dirty no matter how often it was wiped, and the white balusters had turned a creamy yellow that clashed with the bright white trim around the window. They asked us to bring the rail back to a clean, even brown that matched the treads, repaint the balusters a true white, and freshen the treads without a full sanding.
Grey grip marks and yellowed white
Up close, the handrail showed the classic wear pattern. The top of the rail, where hands slide, had lost its clear coat and turned a dull grey-brown from years of skin oils working into bare wood. The underside, which nobody touches, was still glossy and orange. The volute at the foot of the stair, which everyone grabs on the way up, was the worst of all, and the gooseneck at the landing had a sticky film from household cleaners that had built up in its curves.
The balusters had been finished in an oil-based enamel. Oil paint yellows over time, especially in areas that get less direct light, and the lower balusters in the shadow of the landing had yellowed more than the upper ones. The paint itself was sound, with only a few chips at the feet.
The difficult part was the rail’s shape. A straight length of rail can be sanded with a block, but a volute and a gooseneck are compound curves. Sanding them hard enough to remove a worn, oil-soaked finish would flatten their profile. And because the treads were staying, the new rail colour had to match wood we were not going to touch.
Stripping a rail with curves
Protecting floors and the window wall
The foyer floor and the stair treads went under rosin paper with tape along every edge, and drop cloths were laid over the paper at the foot of the stair. The tall wall under the window was protected with plastic to the height of the rail, and the base of each baluster was masked where it met the tread so stripper and paint would stay off the oak.
Handrail, volute and gooseneck
- The rail was washed with a degreasing cleaner to cut the built-up oils and film, then rinsed and left to dry.
- A semi-paste stripper was brushed onto the rail, volute and gooseneck in sections. It clings to curved and vertical surfaces without running onto the balusters below.
- The softened finish came off with plastic scrapers and fine abrasive pads, working with the grain around the curves.
- The rail was neutralized as the stripper label directs and left to dry fully.
- Straight runs were sanded with a profile block shaped to the rail, and the curves were hand-sanded with folded sponges, so the profile stayed crisp.
Balusters
Each baluster was wiped with liquid deglosser to cut the shine of the old enamel, then scuff-sanded with a fine sponge. Chips at the feet were feathered and filled. On the cluster of balusters under the volute, where hands and feet had knocked the enamel off most often, the loose paint was sanded back to bare wood in patches so no edge of it would telegraph through the new white. Since the existing coat was oil-based, we primed with an oil-based primer, which bonds reliably to old oil enamel and gives a sound base for the waterborne topcoat.
Oak treads
The treads had worn evenly and had no bare spots, so they did not need sanding to bare wood. Each tread was cleaned, then screened with a maroon abrasive pad to dull the old clear coat and give the new one something to hold onto. Dust was vacuumed and wiped away.
Coats, sheens and the order of work
Order mattered on this job. The rail was stripped and sanded first, then the balusters were primed and painted, and the treads were recoated last so nothing could drip onto fresh clear finish.
The rail was stained with a rag, wiped off evenly and left to dry. It then took three thin coats of oil-based satin varnish, brushed with the grain and rubbed lightly with a grey pad between coats. Oil-based varnish soaks into stripped oak and stands up well to the constant contact a handrail gets.
The balusters took two coats of white waterborne alkyd enamel in satin, brushed so each coat flowed out on the turned profiles. Waterborne alkyds level like an oil paint but do not yellow the way the old enamel did. We gave each coat the full recoat time stated by the maker before the next went on. The risers were touched up in the same white.
The screened treads took two coats of clear water-based floor finish, spread with a pad applicator, every other step at a time so the family always had a way up.
Matching a rail to treads that stayed put
Getting the rail to match the existing treads was the colour question on this job. Out-of-the-can stains came out too red or too cool against the aged oak. We mixed a custom stain from standard tones and tested it on the underside of the rail near the wall, comparing it with the treads in the morning, when the window light is strong, and again in the evening under the hall lights. The final mix sat right beside the treads without looking like a different wood.
For the balusters, the owners brought out the paint used on the window trim, and we matched that white. Satin was chosen over semi-gloss because the window light rakes across the stair, and a glossier finish would show every brush mark on the turned shapes.
Daily clean-up around a busy entrance
The staircase sits right at the front door, so it had to be safe to walk past each evening. Stripper residue and rags went into sealed metal containers and left the house at the end of each day. Paper on the foyer floor was checked and retaped, and a narrow path to the door was kept clear at all times. Because the family stayed home, we offered Zero‑VOC paint for the risers and ran the stripper with the front door and upstairs windows open.
Keeping the rail looking right
- The varnish on the rail needs its full cure time before heavy use; until then, a light touch is better than a firm grip.
- Wipe the rail every few weeks with a damp cloth and a drop of mild dish soap; skip spray polishes, which build up a film.
- When the top of the rail starts to look dull, a light scuff with a grey pad and one thin coat of the same varnish brings it back long before it wears through.
- Balusters can be wiped with a damp cloth; touch-up white and leftover rail stain are labelled and stored in the basement.
Why this suits Richmond Hill’s bright entries
Double-height entries with open stairs are common in Richmond Hill, and the strong daylight they get makes worn handrails and yellowed paint more obvious than they would be in a darker hallway. A rail can often be restored without replacing it, and treads that are worn evenly can be screened and recoated rather than sanded. Choosing sheen with the window light in mind, and paint that stays white, keeps the stair looking even across the day.
This kind of work is part of our staircase painting and refinishing service, and we have been finishing stairs in homes across the GTA since 2010, including throughout York Region. Every job comes with a free colour consultation and an itemized written quote. If your rail or balusters look tired, reach out with a photo of the stair and we will tell you what it would take.