
A Bramalea semi with two very different flights
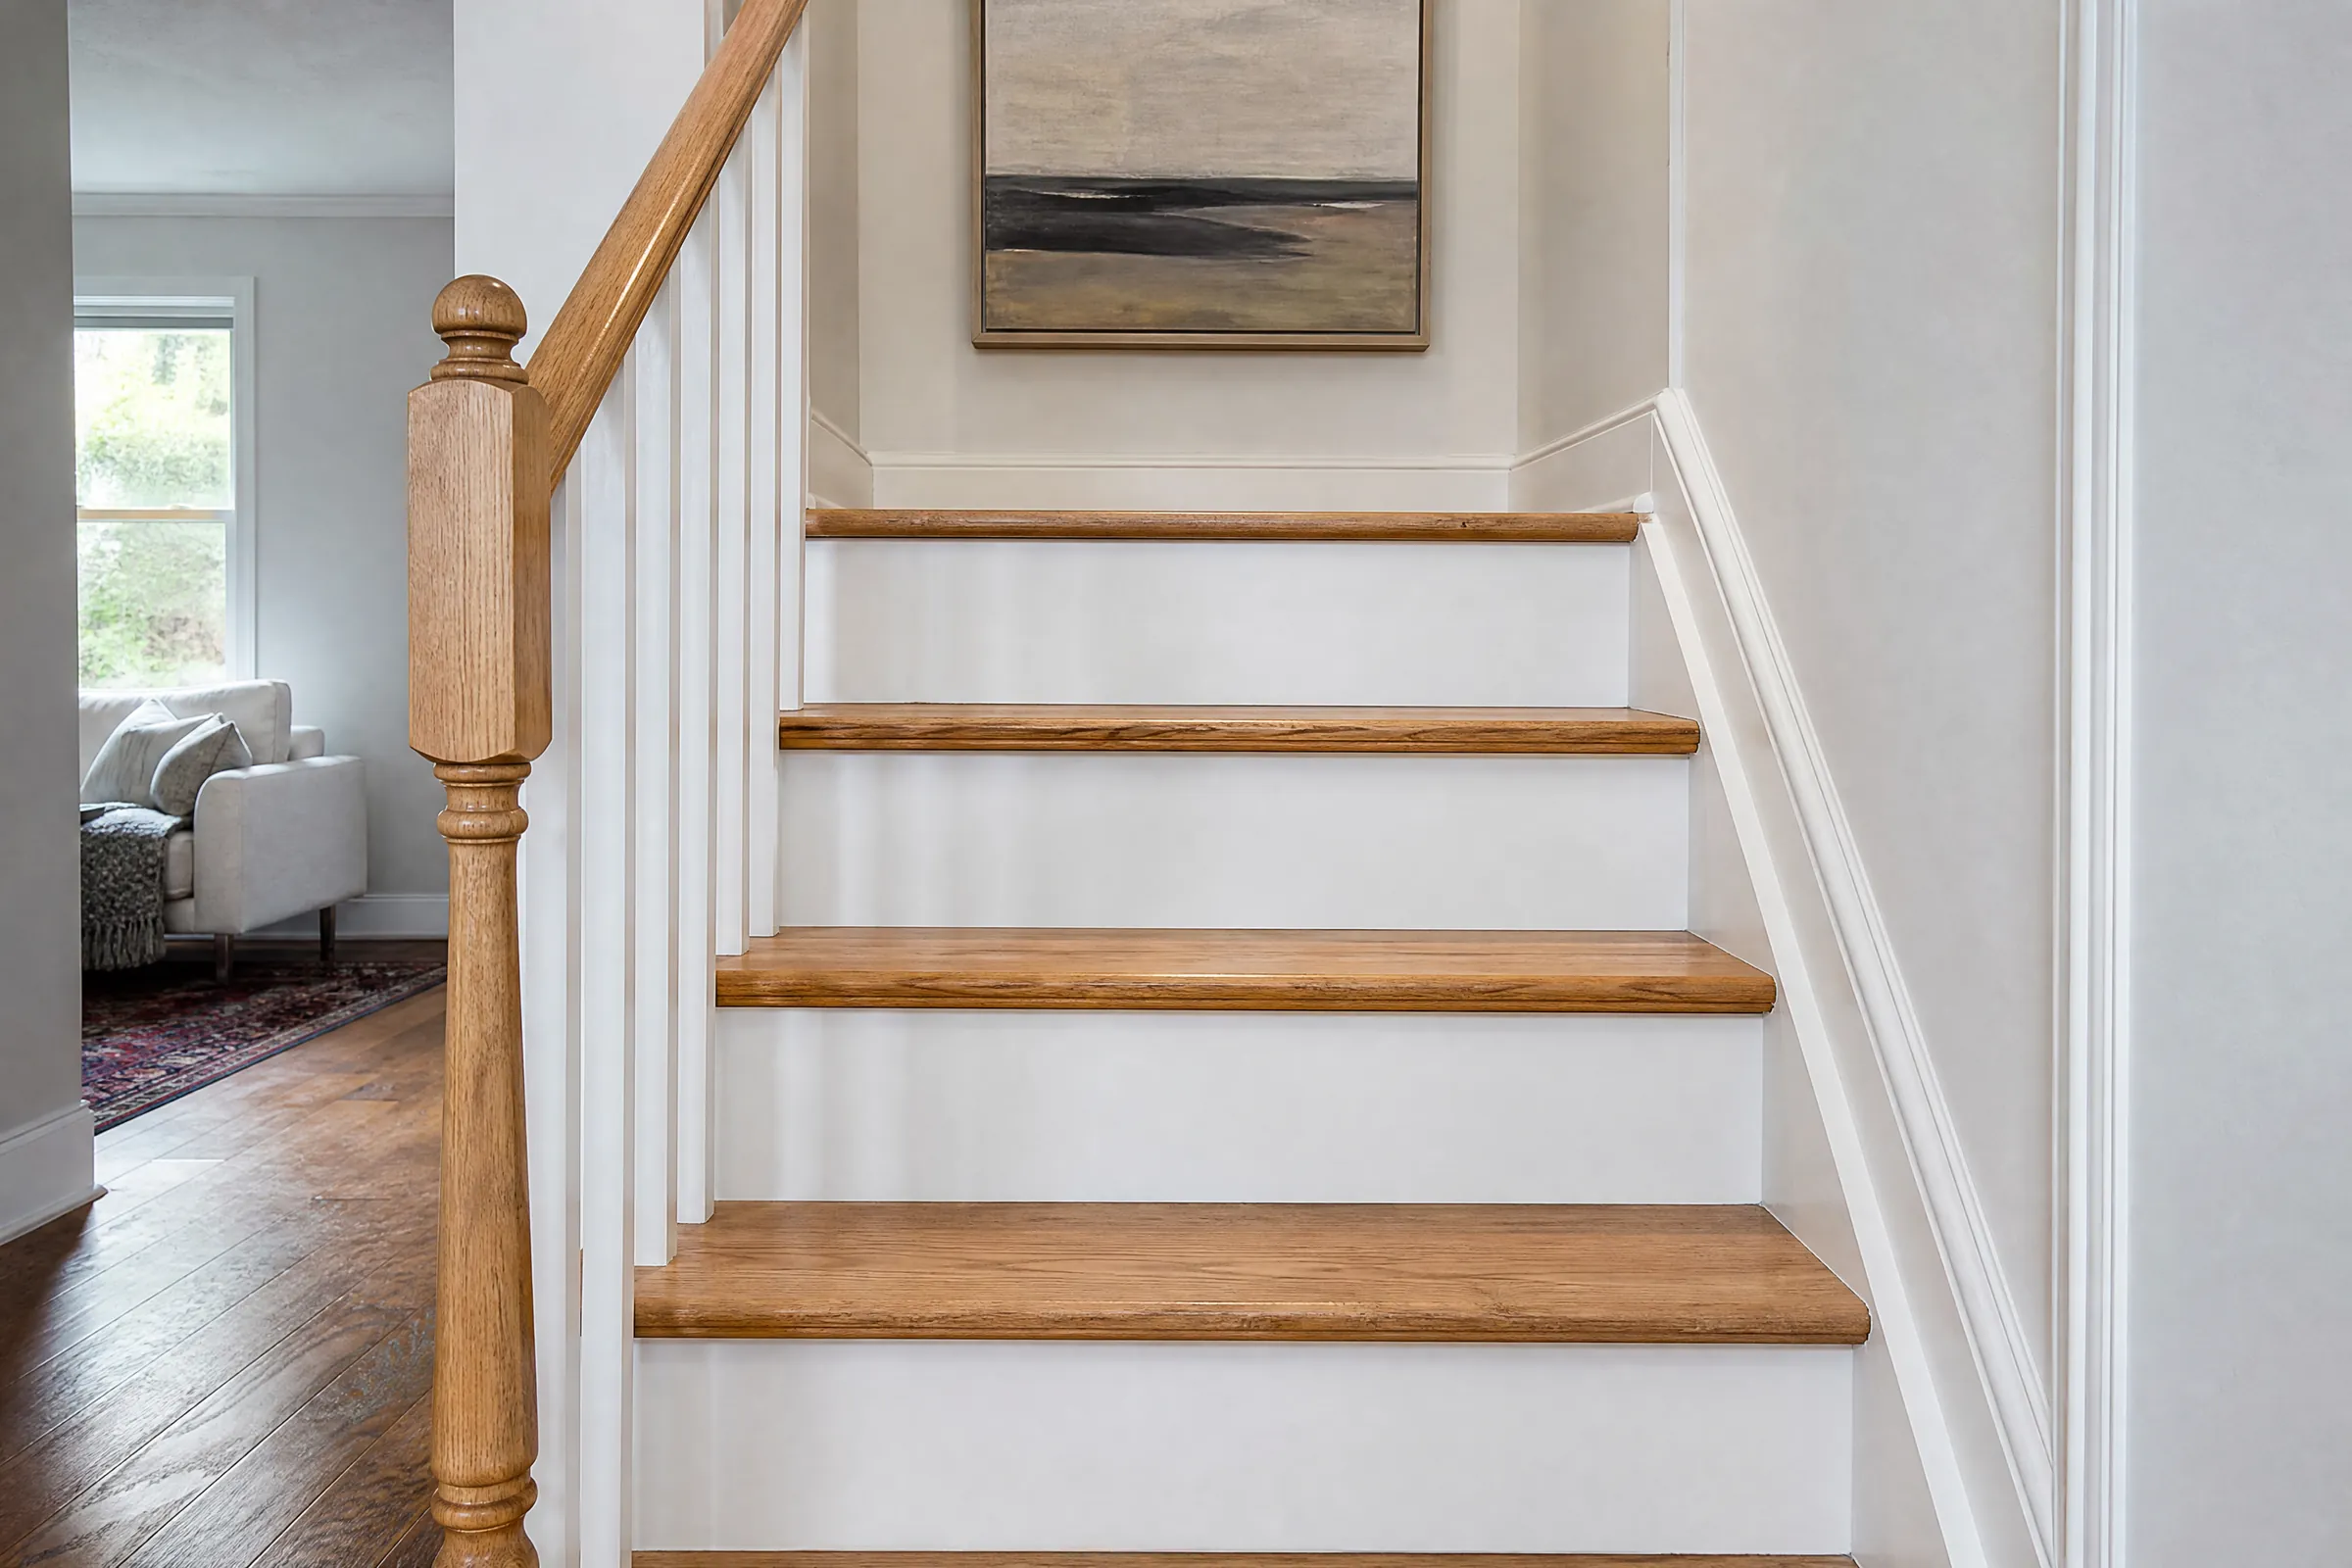
This job was a side-by-side semi in Bramalea, the part of east Brampton that filled in with detached homes and semis through the 1960s and 1970s. Like many of its neighbours, the house still had much of its original woodwork. The main staircase rose from the front hall to the bedrooms in one straight run along the party wall, with solid oak treads, painted risers, a painted handrail and a row of square spindles that had been brushed white long before the current owners moved in. Under the kitchen, a second, plainer flight dropped to the basement: softwood treads and risers, a wall-mounted rail and a half-finished rec room at the bottom.
The owners asked for two things. Upstairs, they wanted the oak treads brought back to a clean natural finish and the spindles, handrail and risers repainted white so the hall looked crisp again. Downstairs, they wanted a durable painted stair that would stand up to laundry trips and boots, and that looked like part of the house rather than part of an unfinished basement.
What decades of family traffic had left behind
The main flight had been painted more than once, and not always carefully. Spindles carried drips that had hardened into small beads at their bases, and the paint on the handrail had worn through to bare wood where hands slide along it. Where old paint met the treads there were ragged lines and specks of white on the oak. The treads had a dull amber finish that had worn to grey wood in a path up the middle of each step, with darker scuffs at the nosings from shoes.
The basement stair had its own problems. It had been painted grey once, and that coat had peeled in sheets on the lower treads, the ones closest to the cool concrete floor. The risers were scuffed black from toes. A lower tread squeaked and had a split along its back edge, and the stringer on the open side had never been painted at all.
The hardest part was the old paint on the spindles. Several layers of unknown age sat on top of each other, and some of the lower coats were oil-based. Brushing latex straight over slick oil enamel, or over chipped edges, would only have brought the chipping back. Each layer had to be dealt with before anything new went on.
Preparing both stairs, surface by surface
Protecting the hall and the rooms around it
The front hall in a semi is narrow, so protection went down before any tools came in. Rosin paper was taped over the hall floor and the upstairs landing, with canvas runners on top. The kitchen doorway was closed off with plastic so sanding dust stayed in the stairwell, and the party wall along the stair was covered with light sheeting below the rail line. In the basement, the washer, dryer and shelving at the foot of the stairs were wrapped.
Spindles, handrail and risers on the main flight
- We tested the old coatings first. A rag dampened with denatured alcohol lifted nothing, which pointed to oil-based paint in the lower layers, so the plan called for a bonding primer. Wherever a blade could do the job we scraped rather than sanded, and every sander ran with a vacuum attached so the dust went into the bag rather than the stairwell.
- Drips and beads were cut back with a sharp scraper, then each spindle was sanded with 120-grit sponges until the edges of the chipped spots were feathered smooth.
- Loose paint on the handrail came off with a card scraper, and the bare patches were sanded flush with the sound paint around them.
- Every surface was wiped with a degreasing cleaner and rinsed, since hands leave oils on a rail that keep primer from gripping.
- Gaps where spindles met the rail and where risers met the stringer were filled with paintable acrylic caulk and tooled flat.
The oak treads
The treads were sanded through the old finish with a detail sander and hand-sanded into the corners, moving from 80-grit up to 150-grit. That took off the worn amber coating, the stray white paint and the shoe marks at the nosings. Because the owners wanted the natural colour of the oak, no stain was used. After sanding, the treads were vacuumed and wiped with a tack cloth.
The basement flight
The peeling grey paint was scraped back to sound edges, and the remaining coating was sanded to give it some tooth. The split tread was glued and screwed from below, and the squeak was cured with a screw driven through the tread into the stringer, countersunk and filled. Bare softwood and the unpainted stringer were spot-primed with a stain-blocking primer so knots would not bleed through the light finish.
Finishing coats on the upper and lower flights
On the main stair, the spindles, handrail and risers got a coat of bonding primer, brushed so it reached into the corners of every square spindle. Once it had dried, it was lightly sanded with a fine pad to knock down raised grain. Two finish coats of water-based alkyd enamel in satin followed, brushed and laid off in long strokes down each spindle so the brush marks ran with the wood. This type of enamel levels out better than ordinary latex and cures hard, which matters on a rail that is gripped every day. We waited out the full recoat time on the label between coats.
The oak treads took three coats of clear water-based floor finish in satin, applied with a pad and lightly sanded between coats once each had dried. A water-based clear keeps oak close to its pale natural tone instead of turning it amber. We coated alternating steps so the family could still get upstairs, and finished the second set after the first had dried hard enough to walk on in socks.
In the basement, the risers and stringer took two coats of the same white satin enamel. The treads got two coats of mid-grey porch and floor enamel, with a fine anti-slip additive stirred into the final coat. That gives a little grip to anyone coming down in socks with a laundry basket in their arms.
Picking the white, and the grey below it
At the free colour consultation we brushed a few whites from sample pots onto a spare board and held each one against the oak and the hall walls. A very bright white looked blue beside the warm treads, and a creamy white looked yellow against the cooler wall colour. The owners settled on a soft white with a faint warm-grey undertone, which sits comfortably between the two. For the basement treads, a mid-grey hides dust and grit from the concrete floor better than anything pale, and it ties in with the poured floor at the bottom of the stairs.
Satin was used for every white surface on both flights. It wipes clean, and it does not show each brush stroke the way semi-gloss would in the side light that comes down the hall.
Keeping the house usable during the work
The owners stayed home throughout, so the order of work mattered. Spindles and rail were primed and painted before the treads were coated, so no drips could land on fresh clear finish. Treads went in the alternating pattern so there was always a way up. The basement stair was painted at a point when the laundry could wait, with a note taped at the top of the stairs. Indoors we used a low-odour enamel, and Zero‑VOC options were on the table had the owners wanted them. Each evening the floors were swept, tools went into one corner of the basement and the runners were checked for drips.
Looking after the stairs from here
- The clear tread finish keeps hardening after it feels dry, so rugs and runners should stay off the steps until the manufacturer’s full cure time has passed.
- Clean the treads with a barely damp microfibre mop. Oil soaps and wax make a later recoat harder.
- Wipe the handrail now and then with a mild cleaner; skin oils build up faster than most people expect.
- We left labelled containers of the white enamel, the grey floor enamel and the clear finish, with the surface written on each lid.
- When the clear coat on the oak looks dull in the walking path, a light scuff-sand and one fresh coat brings it back without a full sanding.
Why this approach fits Bramalea homes
Many semis in this part of the city are on their second or third set of owners, and their stairs show it: layered paint, worn oak and a basement flight that was never properly finished. Testing the old paint, feathering the chips and using a bonding primer is what lets new enamel stay put on those older layers. Newer subdivisions further north, such as Springdale and Mount Pleasant, usually start with factory-finished oak and call for a different approach. There is more about the homes we paint across Brampton and the wider Peel Region on those pages.
Our crews have painted in Toronto and around the GTA since 2010, and two-flight jobs like this one are a regular part of our staircase painting and staining work. If your semi has a staircase that needs attention, send us a few photos or book a visit, and every part of it will be set out on an itemized written quote.